Make Your Own Quadcopter Drone
Table of Content
A wire segment that is uninsulated from Hole 7 should now be surrounded on the terminal. If you live in or near a city that has a radio station, you can connect the antenna to your phone’s metal finger-stop. If you don’t have a phone, you can use an outdoor antenna. This radio, built from scratch, receives AM and shortwave signals from all over the AM band as well as some of the shortwave band.
Repeat the same steps with all other ESCs one by one to calibrate them. The assembled quadcopter drone with ESC module mounted on each arm is shown in Fig. Radio transmitter requires some settings/configurations to control the drone. First, you need to bind your transmitter to your receiver, which enables your transmitter to control the receiver and hence the drone. Binding steps and configurations are normally explained in the user manual.
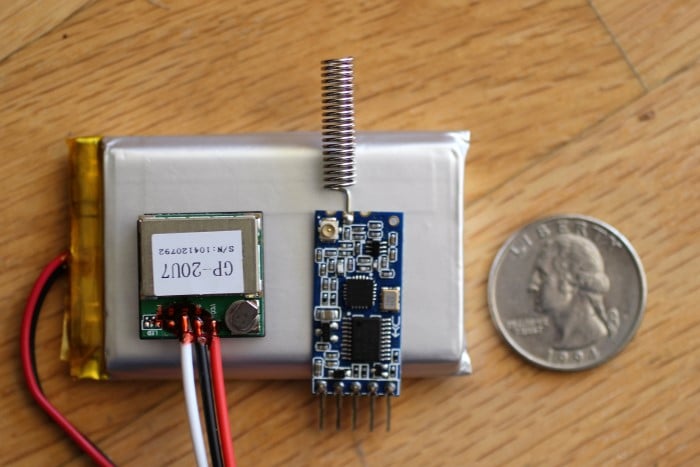
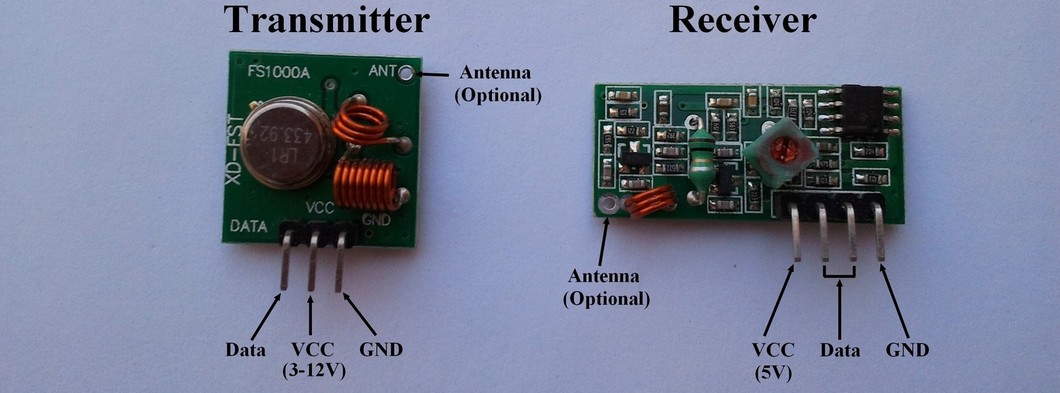
Radio transmitter and receiver
Then the drone can know that communication has failed if messages do not arrive after the expected interval. Make a test program to send your protocol using dummy data in the fields. Be sure your receiver can receive the dummy data correctly. Or if you don't have so many different pieces of data to send, identify each field by it's location in your message. You may be duplicating the same information you sent last time, but won't make a difference and will make programming a bit easier.
Using FM radio, long distance data transmission can be accomplished. FM radio operates in a frequency range of 88 to 108 GHz. There is a music and voice signal, which is located on the audio spectrum. Full audio channels range in frequency from 20 to 20,000 Hz, while FM radio limits the upper modulation frequency to 15 kHz. It means that the FM transmitter is only about 5-8 km away in the open space. Meetings, car driving, village broadcasting, speeches, concerts, and tourism are just a few examples of uses for it.
Step 4: Attaching Coreless Motor to the Frame
How many male ESC header rows you will have, depends on how many motors your drone will have. In our case, we are building a quadcopter, meaning there will be 4 rotors, and an ESC for each. That further means 4 rows with each having 3 male headers. The first header in the first row, will be used for the Signal PID, the second for the 5V , and the third header will be for the GND.
Again, connect first row through fourth row pins of flight controller to first column through fourth column pins of remote receiver, respectively. First screw in the four arms of quadcopter to the central frame as shown in Fig. Solder the ESC to the frame power distribution circuit board.
Step 10: Coding the Receiver
2.4 GHz is the common RF used by Quadcopters for connecting the ground transmitter to the drone. The most common bands of communication are the 2.4 GHz and the 5.8 GHz bands. These are the bands used by a lot of drones on the market including DJI drones.
Other bands like the 1.2 GHz, 1.3 GHz and a few others are also used in the drone industry to communicate between the drone and it's controller. If the copter is to fly outdoors you will probably need a high-power nRF24 for the base unit to give you longer range. The program code will be identical so you could do your initial development with a pair of low power units if you wish. There is no need to be concerned if you are completely unfamiliar with how to get started and lack a technical background. You can quickly and easily set up your own radio station.
Step 7: Making the Transmitter
Ask an adult to assist you with any new tools you do not already have. If your phone cord has four wires instead of two, you should consider which two you should use. A 9-volt battery should be connected with one cord on the positive side and another cord on the negative side.

The quadcopter’s flight controller sends information to the motors via ESC. Each ESC module must be rated at least 10A more than the motor. Suppose your motor is going to consume 20 amperes on full throttle, then the ESC should be rated 30A or more.
Keep the throttle knob at maximum position on radio transmitter and turn on the transmitter. After that connect the LiPo battery and power on the ESC. Wait for two beeps and then move the throttle stick/knob to minimum position and wait for a few seconds till you hear three beeps. Slowly move the throttle stick and the motors will start to rotate. A highly stable, harmonic-free fm transmitter circuit with a frequency range of 88 to 108 GHz can be used in combination with an FM transmitter circuit. This RF transmitter has a long-range output power of about 1W and can be set to higher output modes using transistors such as KT920A, BLX65, BLY81, 2N3553 or 2SC1970.
Channel 6 Channel Transmitter Receiver for Quadcopter Rc Helicopter Rc. How to connect a transmitter for wireless speakers or headphones to. Rc plane transmitter and receiver circuit diagram tuemamiti Disqus. The circuit and for quadcopter transmitter receiver to. RF Transmitter and Receiver Circuit Diagram Circuit Digest.
A FM transmitter is a device that converts a radio signal into an input and distributes FM Modulated Wavelengths to an antenna. An fm transmitter project is a great way to learn about how radios work. You can build your own transmitter and use it to listen to your favorite radio station.

With higher Kv rating of the motors, smaller propellers can be used. Regardless of how they look, controllers need to communicate with the drone, and typically do that using radio waves. According to Perry, drones are typically run by 2.4 gigahertz radio waves. When the transmitter power increases, the range expands as the signal moves further away from the source and stronger.
It features 14 channels, 6 of which are analog inputs and 8 digital inputs. Now assemble our home made flight controller to the center of the drone frame. It is recommended to connect the speed controllers on the bottom side of the frame due to several reasons which involve the functionality of the drone.


Comments
Post a Comment